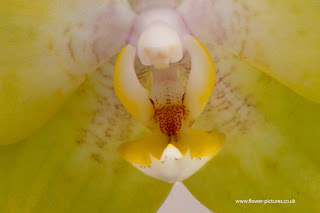
Focus stacking is one of the most useful tools for me in adobe photoshop CS5. There is no in-built facility to do this in photoshop elements 9 but this is a tutorial on how I improvise. For this to work, all photos must have all elements in the picture aligned.
I took two pictures of the same orchid. The first has the front white part of the orchid in focus and the second has the red dots in the centre of the orchid in focus.
- Edit both photographs in the RAW editor so the colours match.
- Open both photos in photoshop elements
- With the photo open which has the majority of the details which you want to keep from the menu choose select>all
- Then from the menu edit>copy
- Then open the window with the other image and from the menu edit>paste. This pastes the first image over the second as a new layer.
- Add a layer mask by clicking on the rectangle button with a white circle in the middle.
8. When you've finished you can flatten the image. From the menu Layer>flatten image.
9. If your happy with the result then save, but don't forget the change the file name.
This is the final image I achieved:
You can see this image on my website: http://www.flower-pictures.co.uk/cut-flowers/hc84cf23#hc84cf23


No comments:
Post a Comment